Wrench Tip Wednesday: Installing a Bib Mousse
One thing many people dread to do on their bike is changing tires or installing mousse tubes. If you are sweating, struggling or becoming fatigued in the process of mounting a mousse, you are not doing it correctly or at least in a beneficial way. Bonecutter Off Road does offer installation of a bib mousse for $10 plus the bib cost.
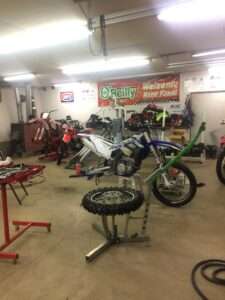
To make life easier a good tire stand is recommended. We prefer Rabaconda. Also, at least four tire irons need to be handy. Then of course, a big bucket of lube. We us the 8lb pal of Plews/Edelmann tire mounting lubricant.
Keep in mind there is many different techniques to change a bib mousse. As always, just like opinions, I understand everyone has their own way. Our method is based off of using a Rabaconda tire changer. For starters, the old tire needs to be removed. Get the wheel set up on the tire changer. Make sure the wheel is secure. The bead breaker on the Rabaconda is handy to help to assist in inserting 4 tire irons around a quarter section of the tire. Push your knee against the side of the tire that is opposite to the irons and pull the irons towards you. In return, the bead should start to pop off the rim. Flip the wheel over. Use the bead breaker to push down on the tire right above where the bead started to pop off of the other side. Now you can keep turning the wheel and press down with the bead breaker. The tire should be hanging on the upper bead that has not been dismounted yet. Pull the bead breaker as close as possible to rim and find a good spot to push down the side over rim to completely remove it. When it starts to come off, spin the wheel and use the bead breaker to push the tire the rest of the way off all around until it falls down. Tip: If the bead breaker starts slipping over the side of tire when trying to push over rim, keep turning and searching for a sweet spot where it finally gets the right grip and you can push the side down over rim. If you have a rim lock, you can push the link on the Rabaconda bread breaker up so that it pushes over the rim lock to remove the final amount of tire.

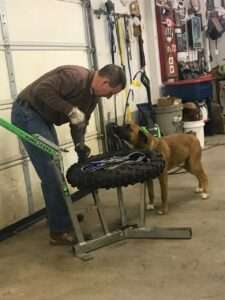
Now, this is where it gets tougher. Put the wheel back on the wheel stand. Make sure the wheel, tire, and mousse is clean otherwise mud and grime will deteriorate the mousse faster. If you do not already have gloves on, I would glove up. Lube is very important. The little packet of lube that comes with a Michelin Bib Mousse generally is not enough so that is why we also use the bucket of lube mentioned above. Lube the inside of the tire and the part of the mousse that comes in contact with the rim. Put the bib inside of the tire you are wanting to install. The tire needs to be put on top of the wheel that is sitting on the stand. Support the tire with your knee. Then use a tire iron to push part of the lower bead over the rim. Slowly work your way around the tire until the entire bottom bead of the tire is over the rim. Put the tire iron right beside the rim lock and leave it in between the tire and the rim. Lock this in by hooking it under a hook next to the tire changer’s handle. Start pushing the top bead of the tire onto the rim. Small steps with multiple irons help insure the tire stretches over the rim easily. Once you get all the way around to the iron that was beside the rim lock, go ahead and remove it. Push the rim lock in by using an iron and press the last section of tire onto the rim using the bead breaker. At this point, you should be ready to rip again! Sometimes it is necessary to bounce the tire/wheel up and down on the ground to pop the bead in. If that doesn’t work then shoot some air in it, a rubber o-ring should be put around the rim lock to do that. Side note, you will not need to stand on the machine as pictured and if you do…you are doing something wrong.
Keep in mind, a Rabaconda is not necessary to mount a bib mouse but a TON of tire irons and lube are the most beneficial things to have. My entire family runs bibs in all of our bikes because getting a flat tire is not worth it to us.